Create a Distance Measurement
🕐 Read time: 4 min
Written By Clark Yuan
Last updated 3 months ago
Overview
The Distance tool lets you measure linear distances across your spatial data on a 2D map or directly on a 3D point cloud. Measurements can be refined, renamed, and color-coded for client-ready deliverables.
Stitch3D supports two types of distance measurement:
2D Distance — measured on a raster layer (orthomosaic, DEM, or similar) in the 2D map view. Can also be drawn on the basemap with all file layers hidden.
3D Distance — measured directly on a point cloud in the 3D Viewer.
ℹ️ Note: 3D distance measurements include XY coordinate information and automatically sync to the 2D map. 2D distance measurements do not carry a Z elevation value and therefore cannot be represented in the 3D Viewer. The sync is one-way only.
How to create a 2D distance measurement
Open your Project and enter the 2D map view using the View Toggle in the top left of the Viewer.
Click the Distance icon in the annotation toolbar at the top center of the Viewer.
Click on your starting point on the map to place your first vertex.
Continue clicking to place additional vertices and extend the measurement path.
Double-click to complete the measurement.
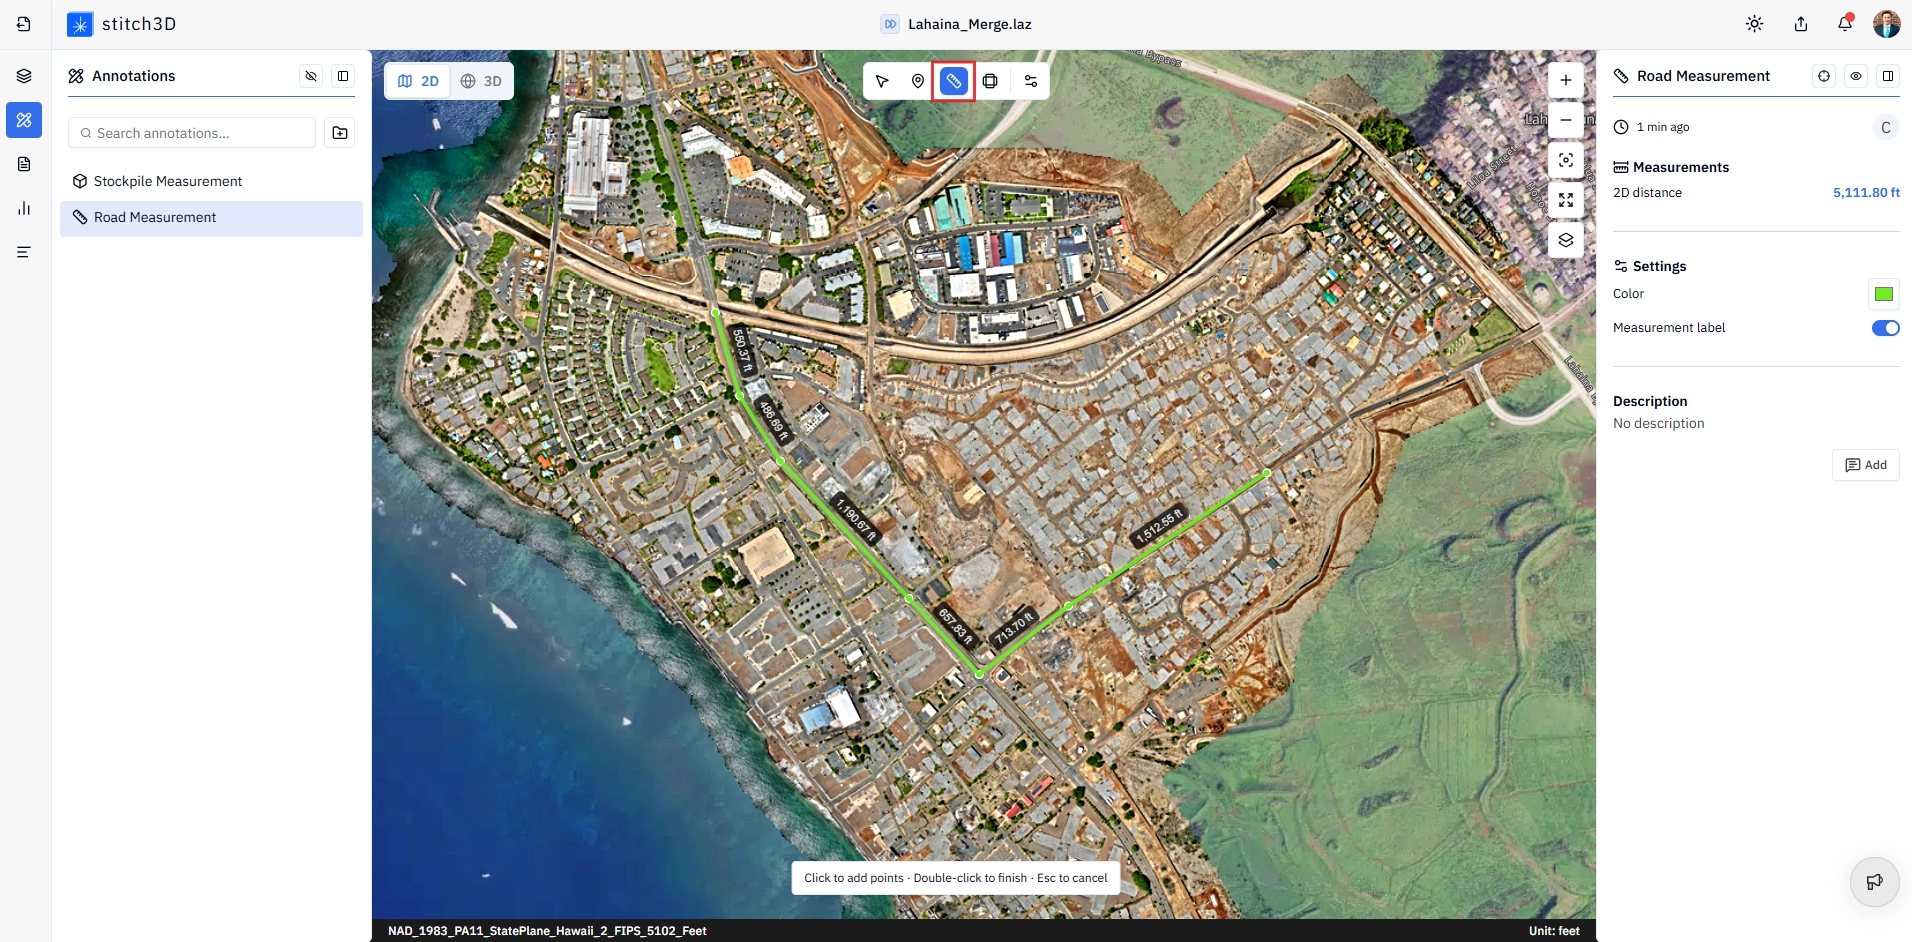
💡 Tip: To measure on the basemap without interference from other file layers, toggle off all layers in the Layers Panel before drawing your measurement.
Refining a 2D distance measurement
Once placed, you can adjust the measurement without starting over:
Drag a vertex — click and drag any existing vertex to reposition it
Add a new vertex — click the midpoint of any segment to split it into two segments, giving you finer control over the measurement path
How to create a 3D distance measurement
Open your Project and enter the 3D Viewer.
Click the Distance icon in the annotation toolbar at the top center of the Viewer.
Click directly on the point cloud to place your first vertex.
Continue clicking to place additional vertices along the point cloud.
Right-click to complete the measurement.
✅ Once created, the 3D distance measurement automatically appears on the 2D map. No additional steps are needed.
Reading your results
3D Viewer — Information Panel
When a 3D distance measurement is selected, the Information Panel on the right displays:
2D Viewer — Information Panel
When a 2D distance measurement is selected, the Information Panel displays:
Settings
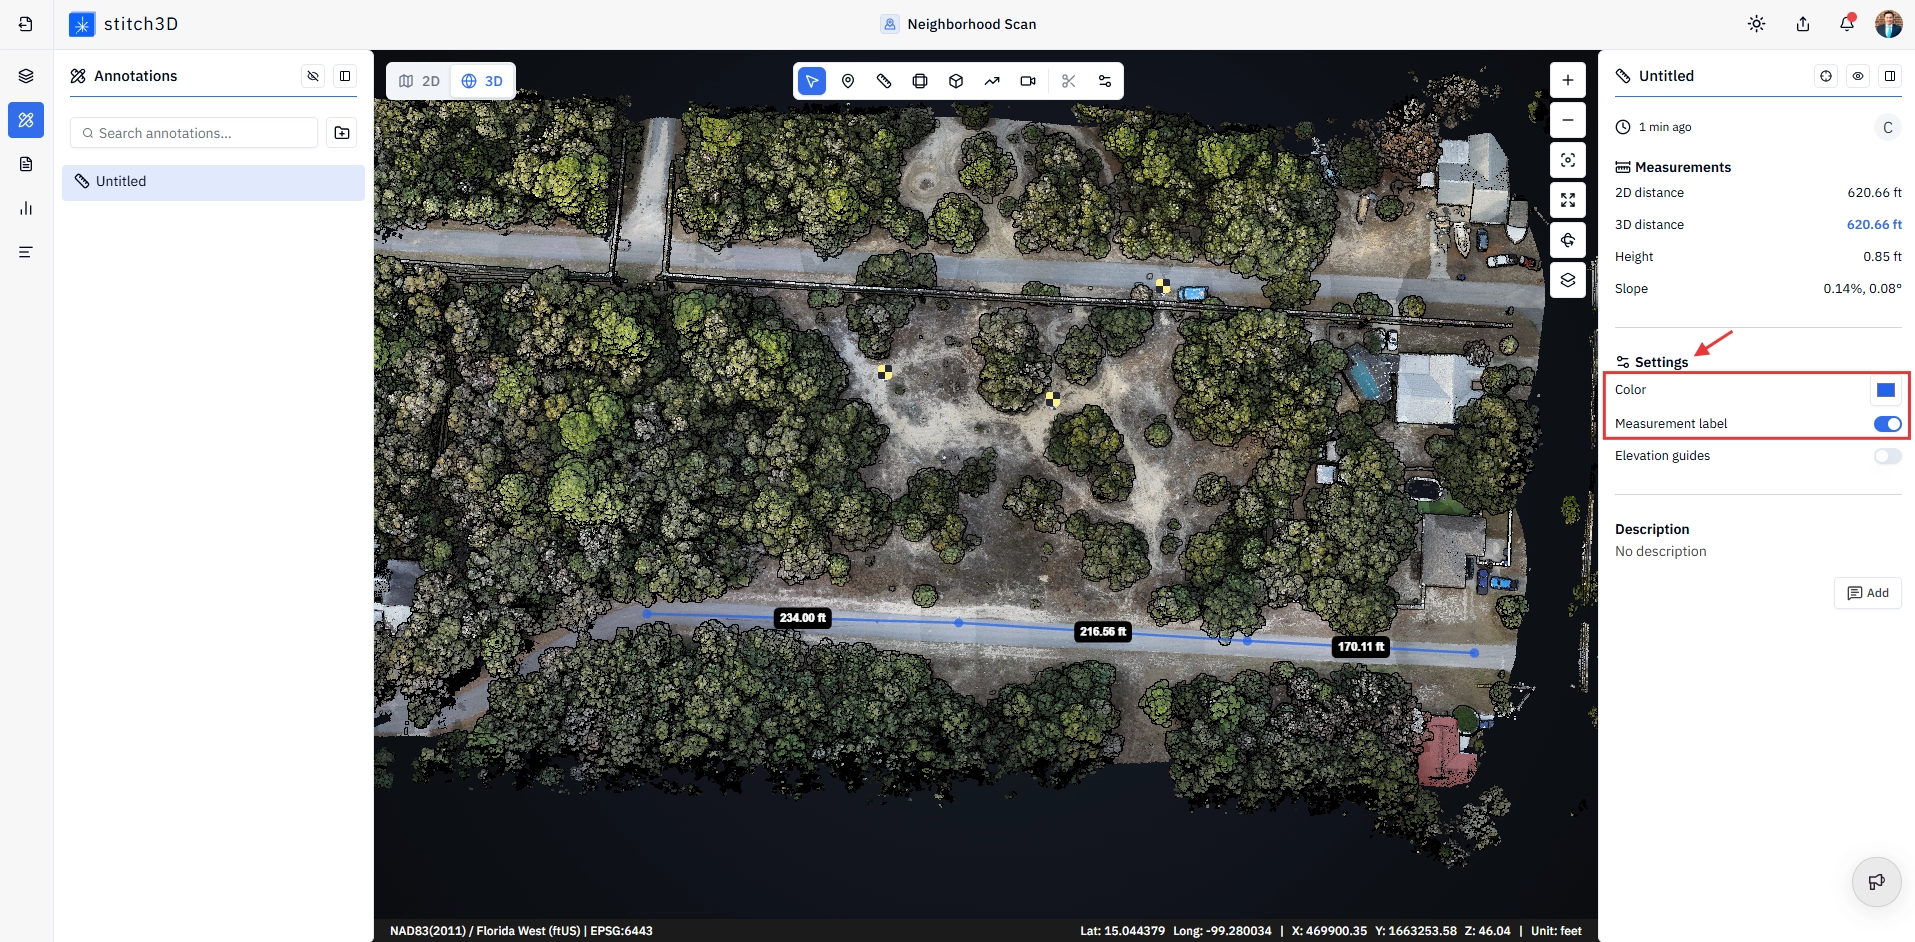
Changing the color
Click on the distance annotation to open the Information Panel on the right side of the Viewer.
Under the Settings section, select the Color icon and change to the desired color.
💡 Tip: Color-coding is useful when working with multiple measurements in the same Project e.g., distinguishing between different site boundaries, access routes, or construction phases.
Toggling measurement labels
Segment distance labels can be turned on or off from the Information Panel on the right:
Labels on — each segment displays its individual distance value along the line
Labels off — labels are hidden for a cleaner view, useful for client presentations
The total measurement value remains visible in the Information Panel regardless of the label setting.
Managing distance measurements
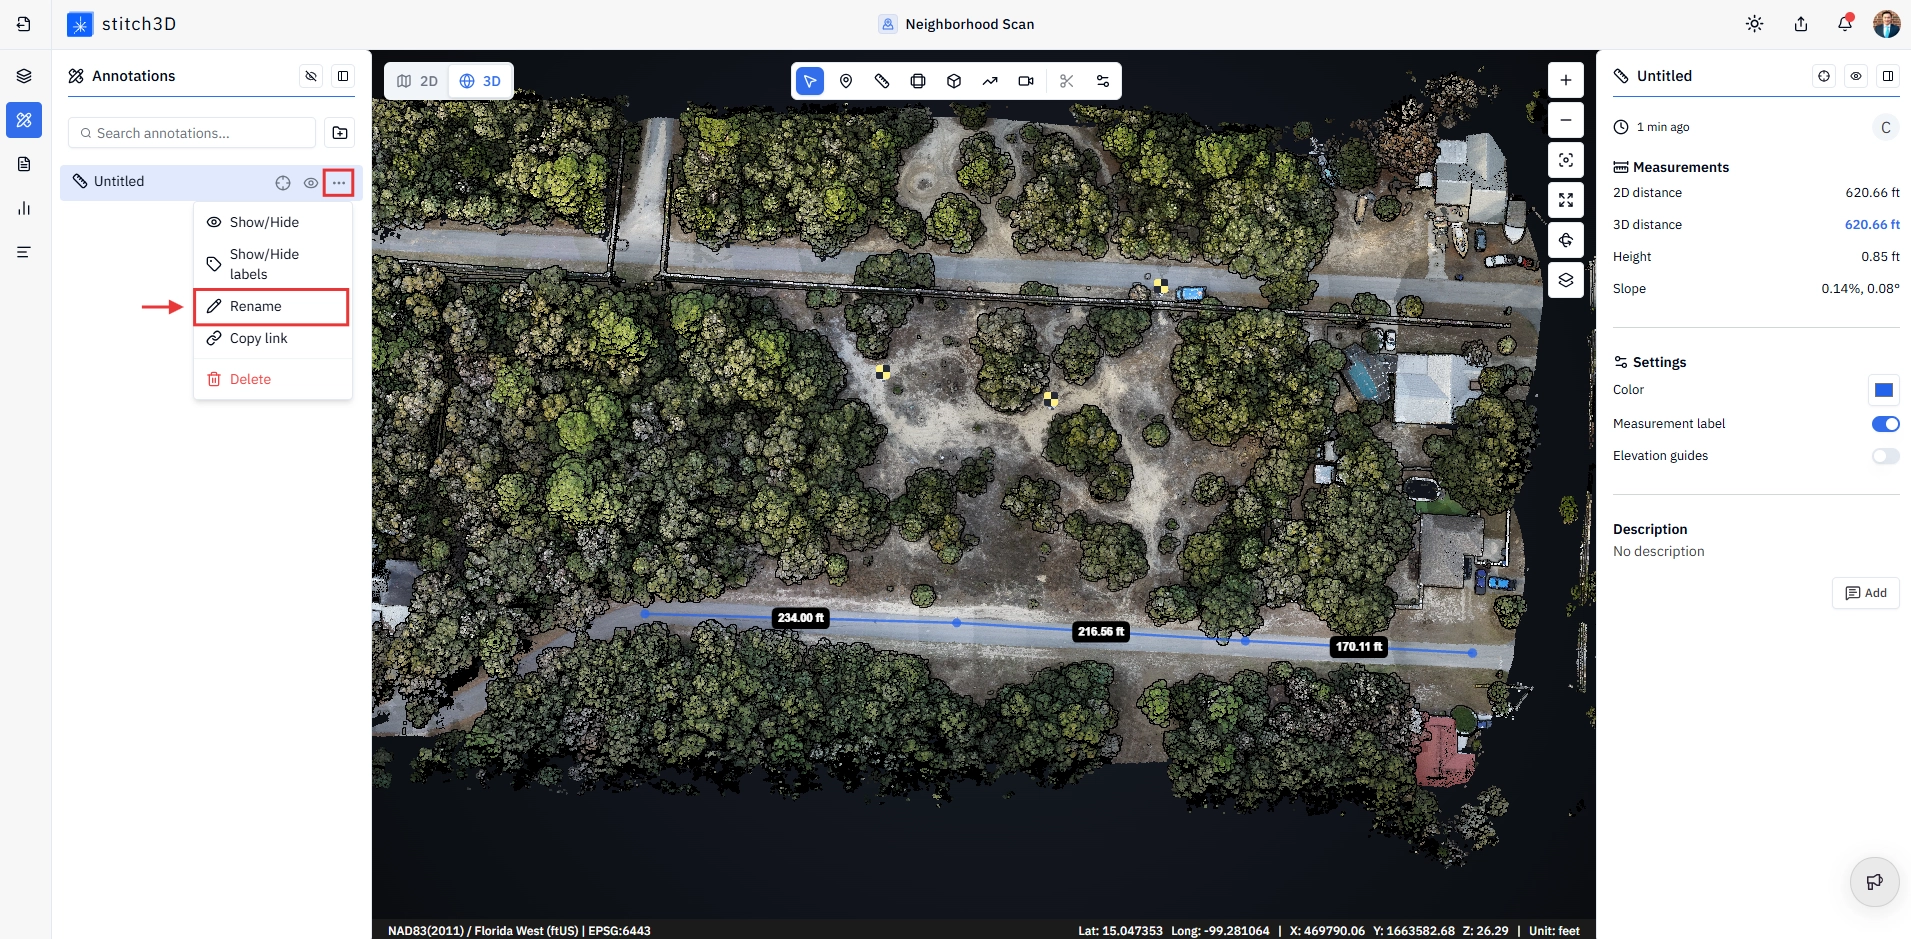
Renaming a measurement
Open the Annotations Panel on the left side of the Viewer.
Locate the distance measurement you want to rename.
Click the three dots next to the measurement name and type a new name.
Deleting a measurement
There are three ways to delete a distance measurement.
Option 1 — Directly in the Viewer
Click on the measurement in the Viewer to select it.
Press the Delete key on your keyboard.
Option 2 — From the Annotations Panel
Open the Annotations Panel on the left side of the Viewer.
Click to select the measurement. Hold Shift or Ctrl to select multiple measurements at once.
Press the Delete key on your keyboard.
Option 3 — Via the row menu
Open the Annotations Panel on the left side of the Viewer.
Hover over the measurement row and click the ⋯ (three dot) menu.
Select the red Delete option.