How to upload DEMs (raster)
🕐 Read time: 3 min
Written By Clark Yuan
Last updated 2 months ago
Overview
Digital Elevation Model (DEM) GeoTIFFs are single-band elevation rasters exported from drone processing or GIS software. They can be uploaded to any Stitch3D Project and viewed in the 2D Viewer as hillshade or slope with no additional software installation required.
Before you start
Make sure you have a Project ready. If you haven't created one yet, see How to create a Project first.
How to upload a DEM
DEMs are uploaded through the same Raster file type as orthomosaics. Stitch3D automatically detects that your file is a DEM from its data; there is no need to select a separate file type. The upload steps are the same for both Quickstart and Georeferenced Projects.
Open your Project from the Projects or Dashboard page.
Click the Upload button in the top right corner of the Project page.
Select Rasters as the file type.
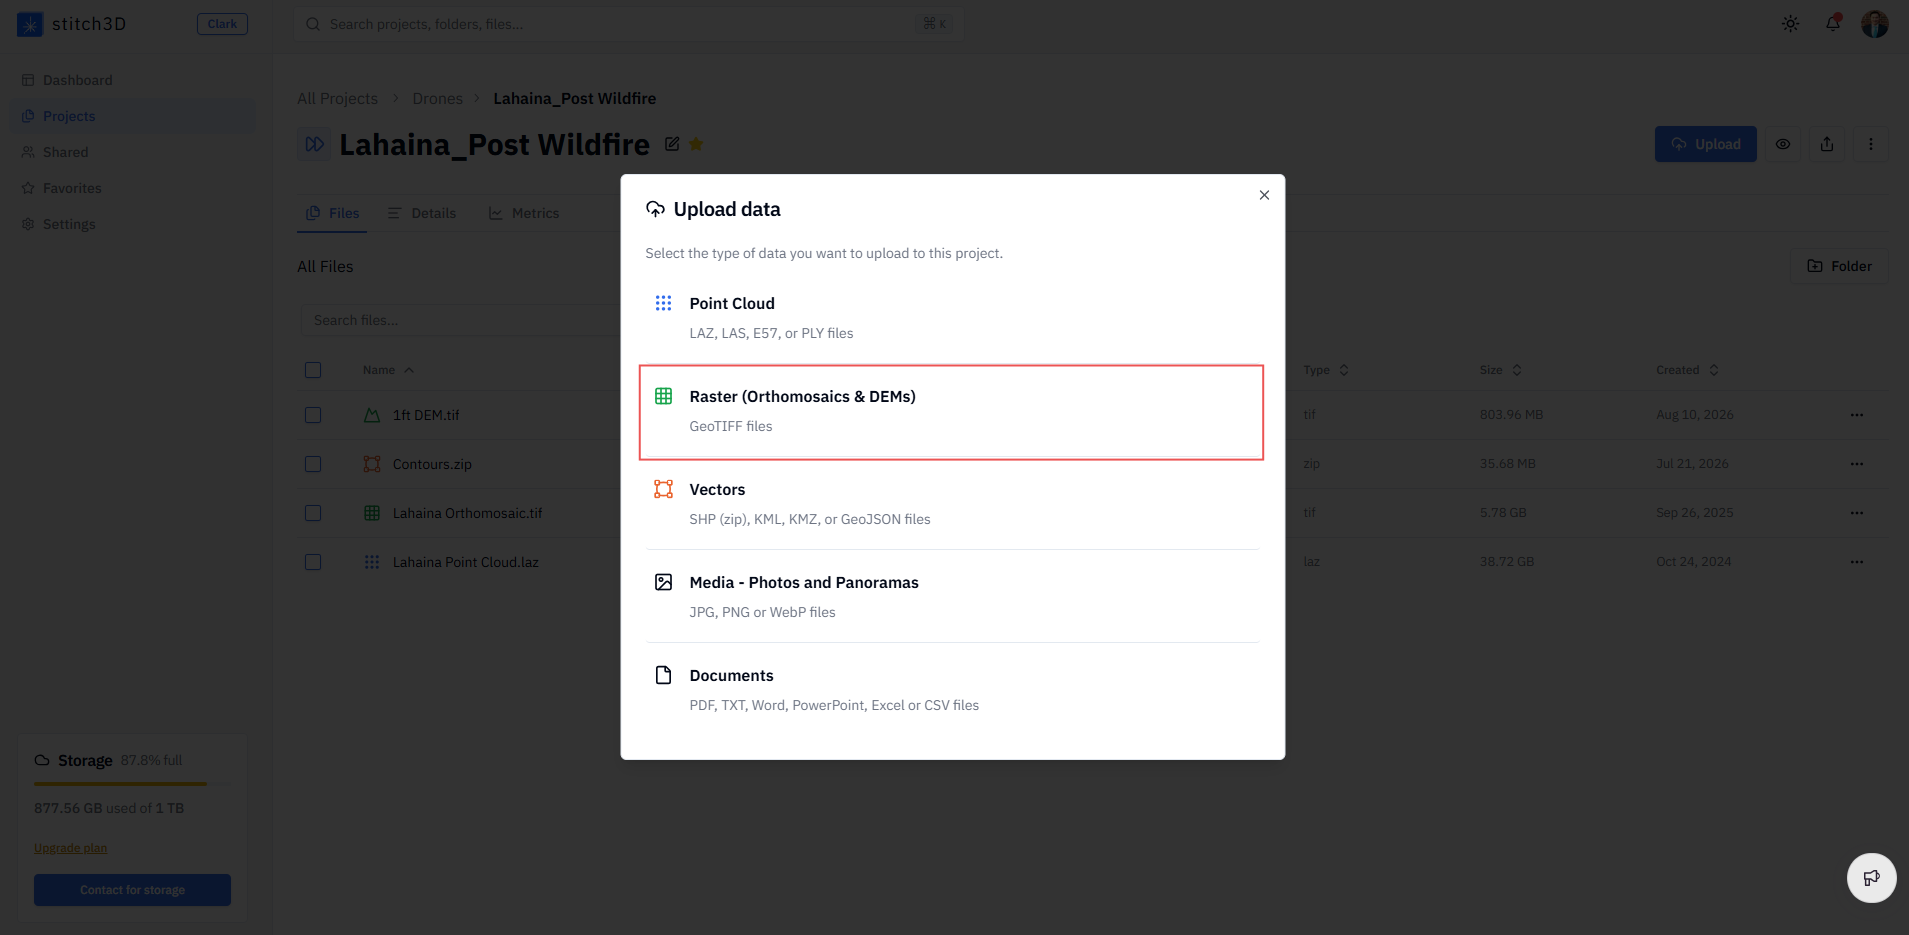
Select your
.tif,.tiff, or.geotifffile by clicking to browse, or drag and drop it directly into the upload area.Stitch3D reads the file and automatically labels it as a DEM (single-band elevation data) or an Ortho (color imagery) in the review list. You do not need to choose.
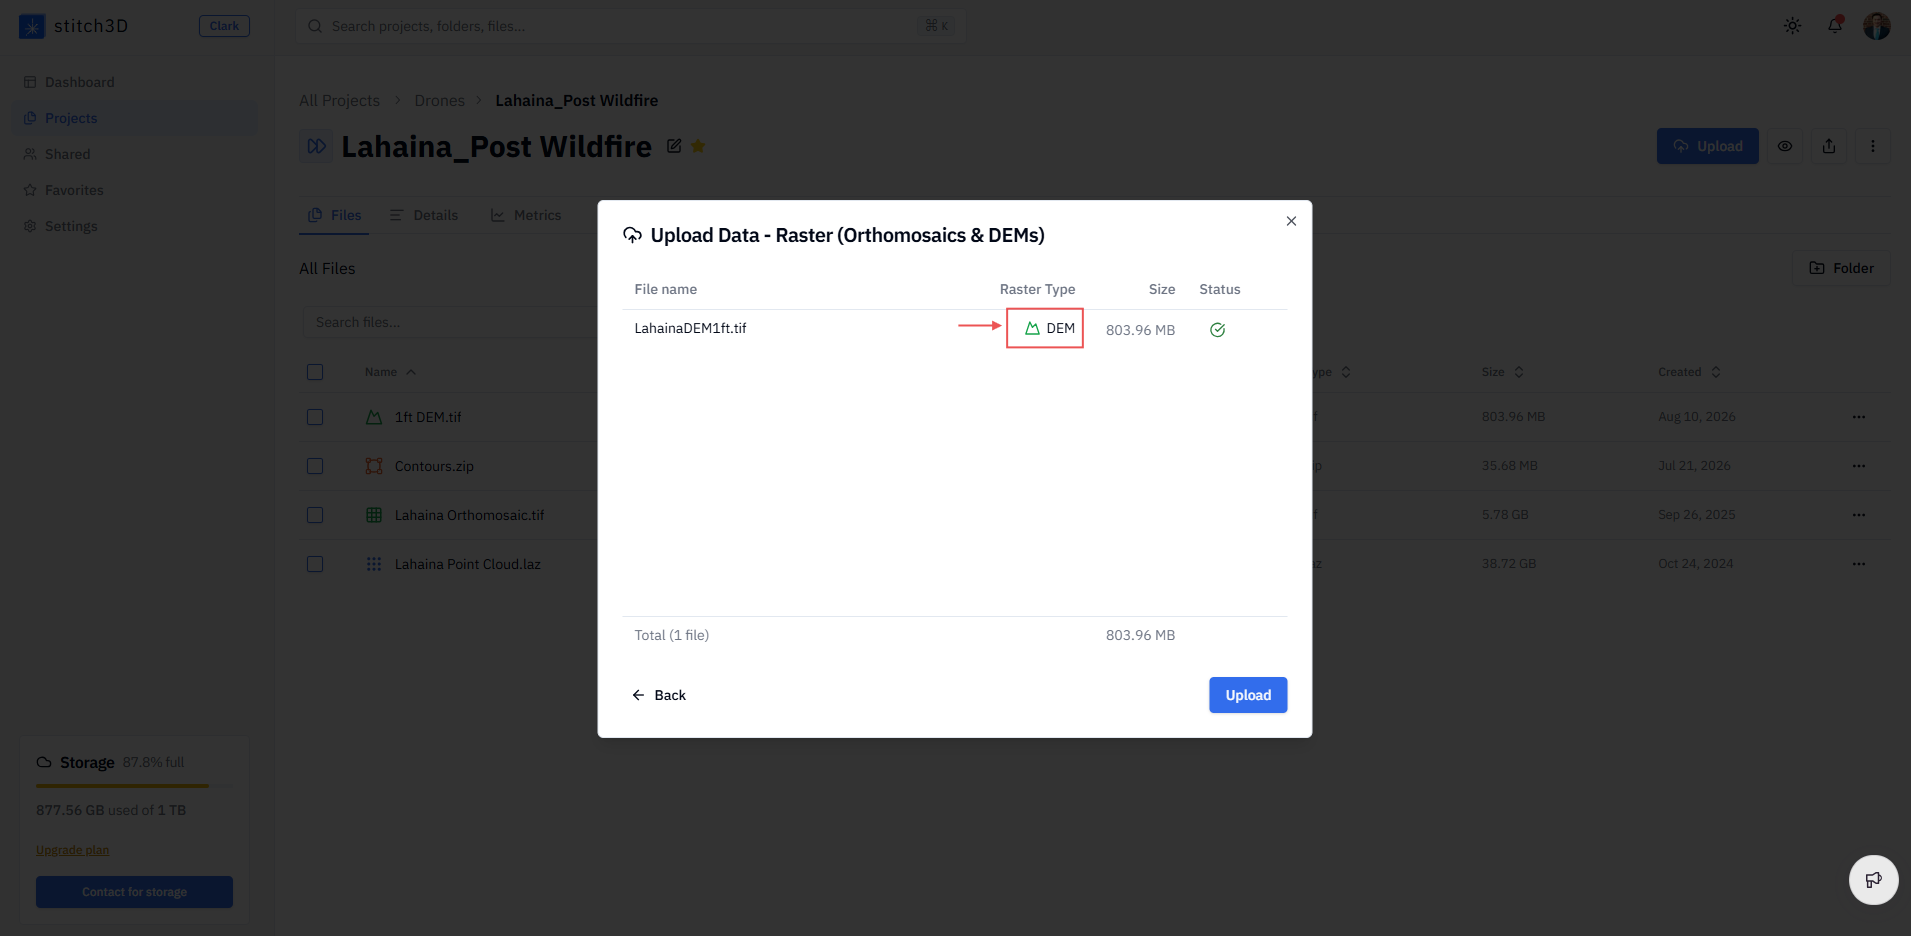
If there are no errors, click Upload. If any files show errors, remove them, address the error message, and try again.
Stitch3D processes your DEM and adds it to your Project file list.
View the DEM by clicking directly on the file name or the View Project button.
✅ Confirmation: Once processing is complete, your DEM appears as a layer in the Project and you will receive an email notification.
Viewing your DEM
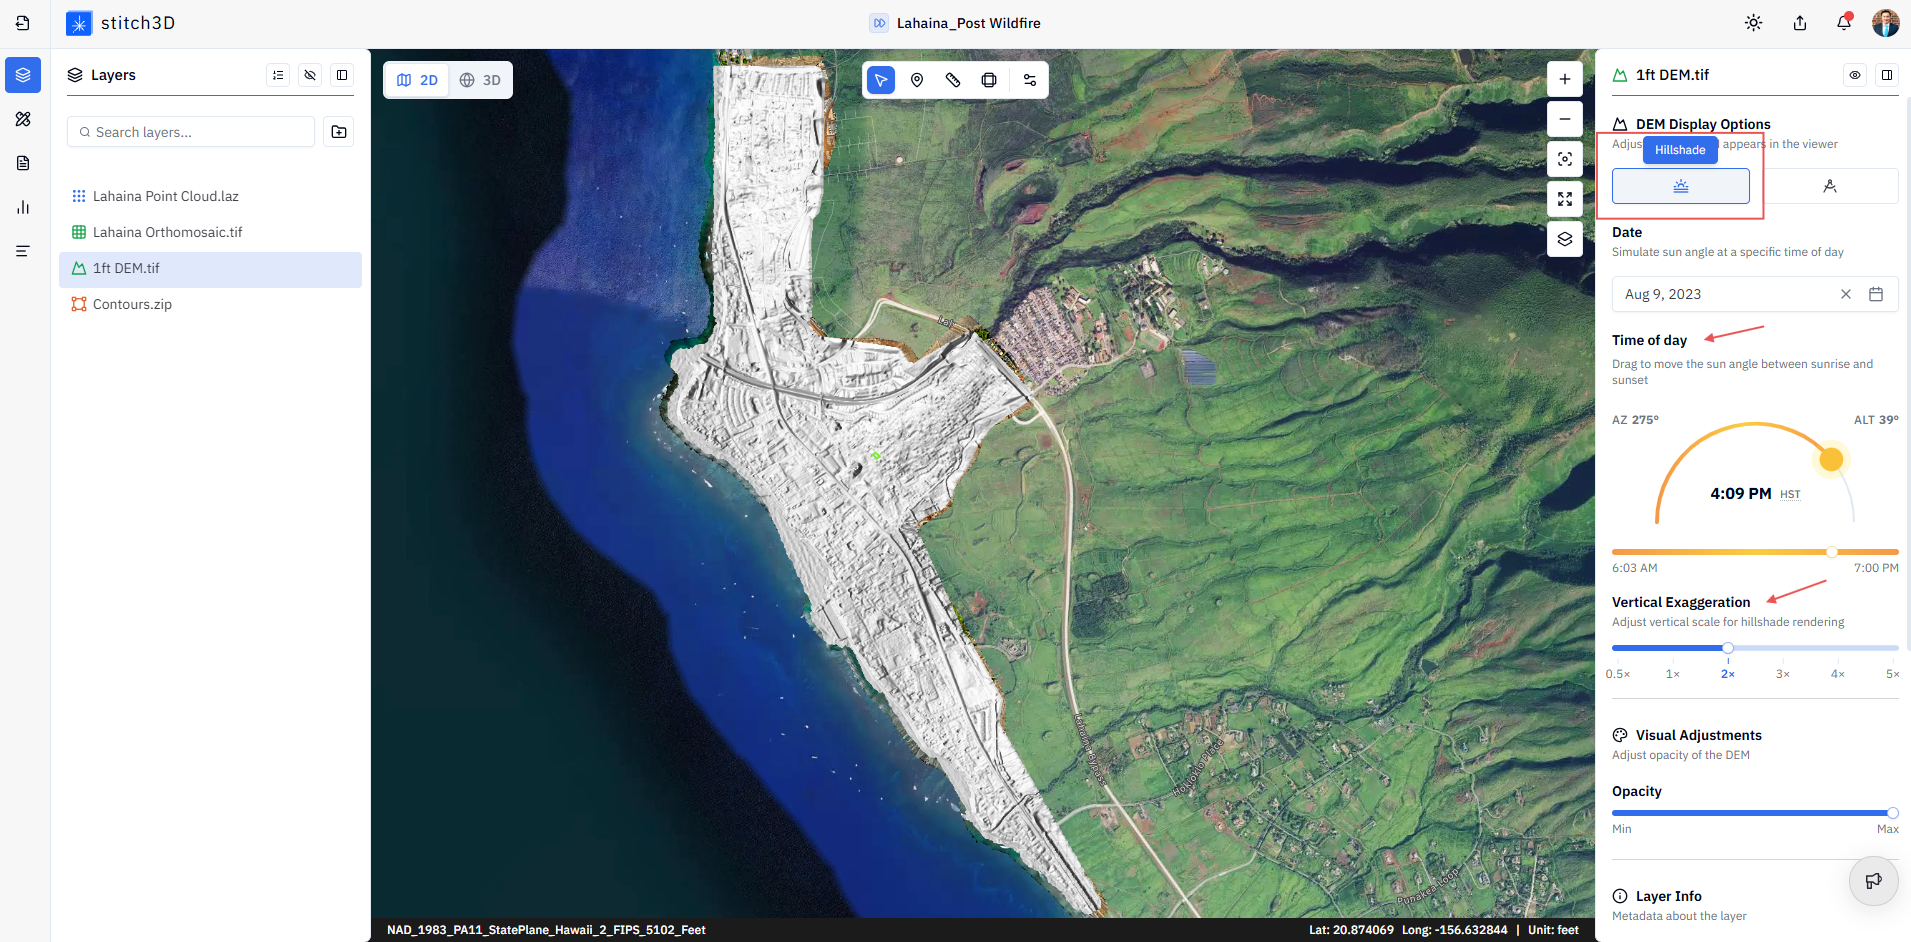
DEMs render in the 2D Viewer. Click on the DEM layer in the Layers Panel and open DEM Display Options in the Information Panel on the right to control how the elevation is shown.
Hillshade Shows shaded relief lit by a simulated sun position. Set a Date and drag the sun path control to change the time of day. Adjust Vertical Exaggeration to flatten or amplify the relief.
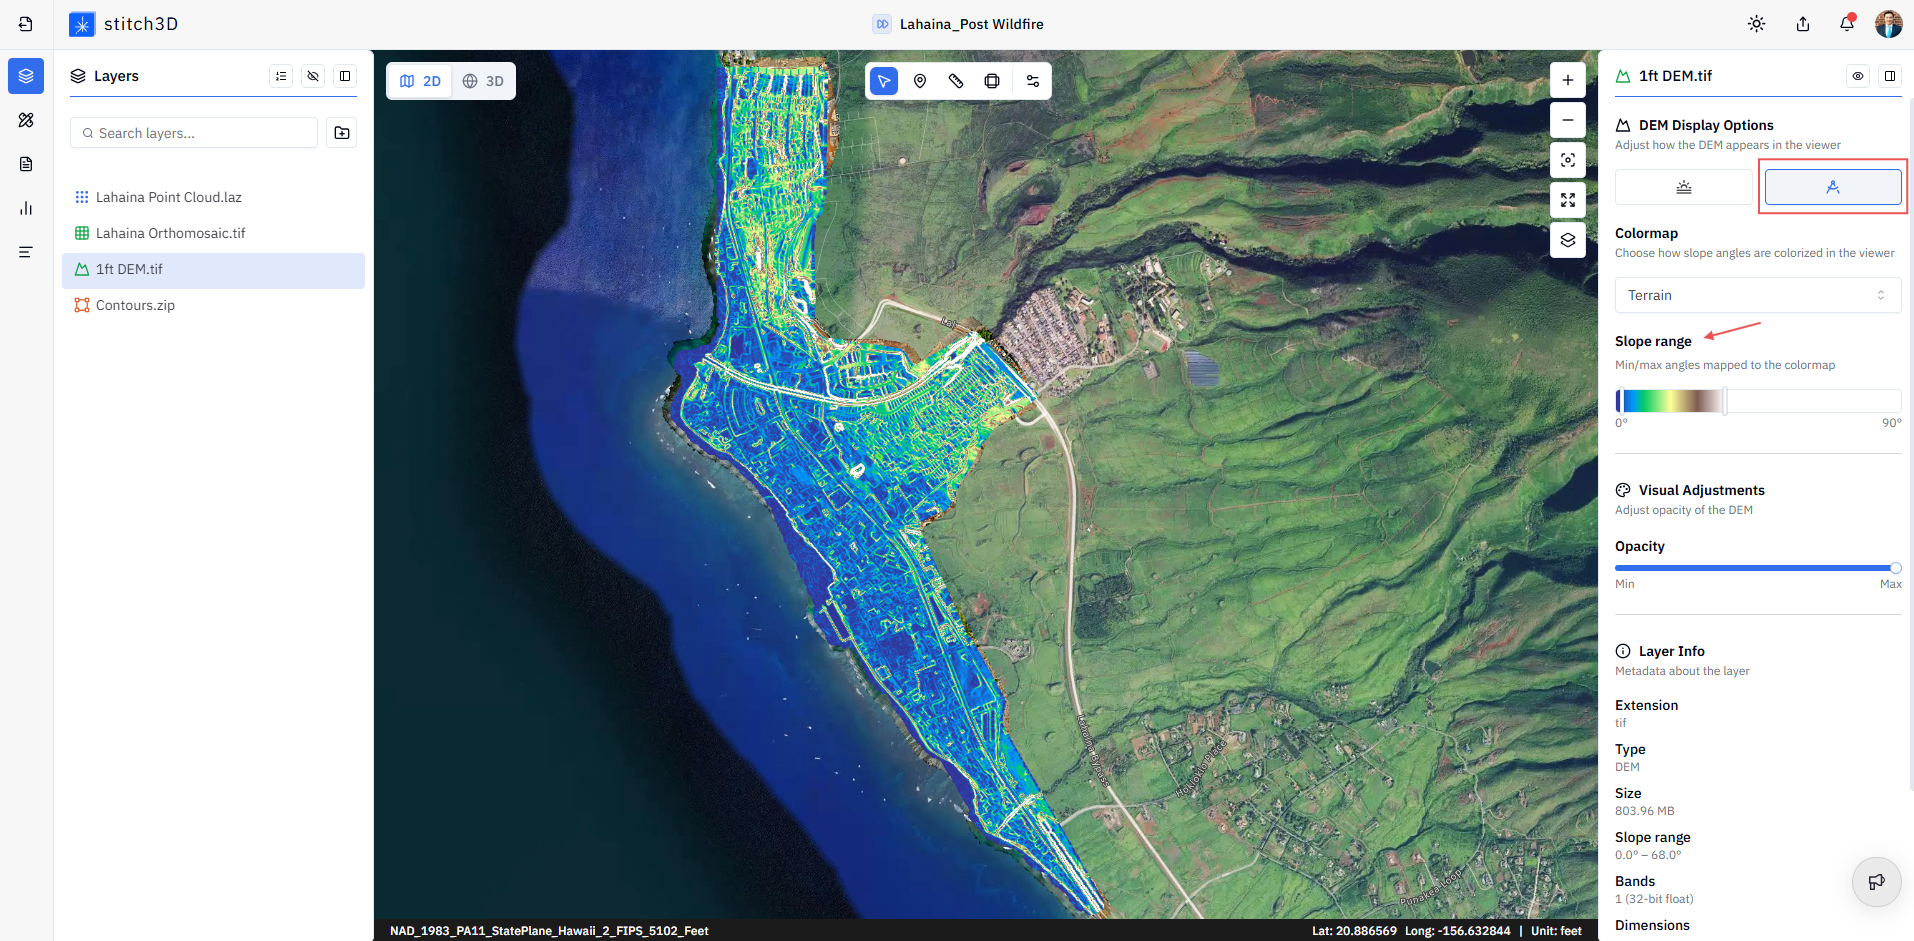
Slope Colorizes the terrain by steepness in degrees. Pick a Colormap and narrow the Slope range to increase contrast on the specific angle range you want to focus on.
ℹ️ Note: Vertical Exaggeration and lighting are display-only settings. They change how the DEM looks in the Viewer without affecting the underlying elevation values.
DEMs in Georeferenced Projects
In a Georeferenced Project, your DEM is automatically validated against the Project CRS on upload and reprojected if needed. This keeps your elevation data spatially aligned with your point cloud and orthomosaic in the Viewer.
If your DEM's horizontal CRS differs from the Project CRS, Stitch3D reprojects the file to match. You will be asked to acknowledge this before the upload proceeds. If your DEM has no vertical CRS embedded, the Project's vertical CRS is assumed.
💡 Tip: For best results, export your DEM in the same CRS as your Project before uploading. Stitch3D will reproject if the CRS differs, but starting in the correct CRS avoids any risk of reprojection error and speeds up processing.
What's supported
A DEM is defined by its data, not by how the image looks. It must be a single band of raw elevation values (one number per pixel) stored as floating point or signed integer.
ℹ️ Note: Your DEM must include embedded CRS metadata for correct spatial positioning in the Viewer. Most drone processing and GIS software (DJI Terra, Metashape, RealityCapture, Pix4D, QGIS, ArcGIS) embeds this automatically on export. If your file has no CRS metadata, it may not upload or may not display in the correct location.
⚠️ File size limit: 25 GB maximum.
Troubleshooting
My DEM uploaded but isn't displaying correctly - Check that your file includes embedded CRS metadata. Open it in your processing or GIS software and confirm a coordinate system is assigned before exporting. If you are in a Georeferenced Project, also confirm your Project CRS matches your data's region. For help resolving CRS errors, see How to fix a raster CRS error.
My file was labeled as an Ortho, not a DEM - Stitch3D detects file type from the data itself. If your file was labeled as an Ortho, it likely contains RGB color bands rather than a single elevation band. Try exporting the data again from your processing software as a single-band elevation GeoTIFF and re-upload.
My upload failed - Confirm your file is a .tif, .tiff, or .geotiff and is not zipped. If the issue persists, check the Stitch3D Status Page for any known pipeline issues, then contact support.
Related articles
Was this helpful?
Still need help? Ask the team