How to upload point clouds
🕐 Read time: 3 min
Written By Clark Yuan
Last updated 15 days ago
Overview
Uploading a point cloud to a Stitch3D Quickstart or Georeferenced Project makes it instantly viewable in the browser-based 3D viewer.
💡 Make sure you have a Quickstart or Georeferenced Project ready. If you haven't created one yet, see How to create a Project first.
Option A — Upload to a Quickstart Project
Quickstart Projects accept any point cloud in any CRS, including non-georeferenced data. There is no CRS validation on upload.
Steps
Open your Quickstart project from the Projects or Dashboard page.
Click the Upload button at the top-right corner of your Quickstart Project page.
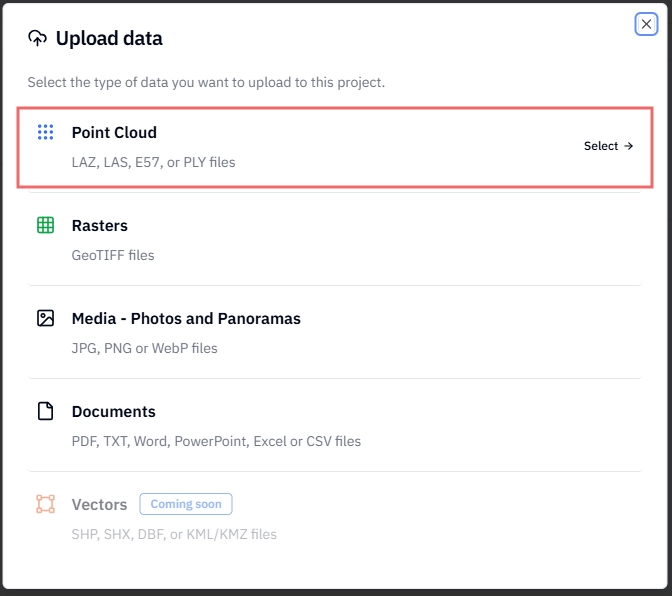
Select the Point Cloud option.
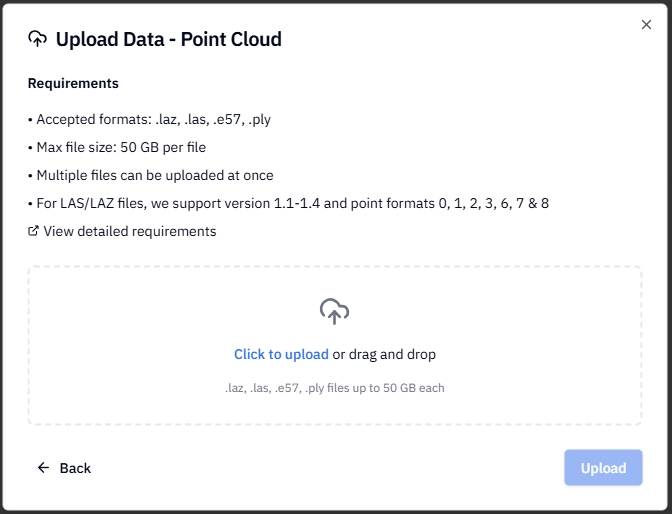
Select your file(s) by clicking to upload, or drag and drop them directly into the upload area. You can upload up to ten (10) files at once.
Check the Status of your file(s). If there are no errors, click the Upload button.
Stitch3D will begin processing your files. You'll see a progress indicator while processing runs.
Once processing is complete, your point cloud will appear in the Project file list.
View the point cloud by either clicking directly on the file or the View Project button (next to the Upload button).
✅ Confirmation: You'll receive an email notification when your point cloud has finished processing and is ready to view.
Option B — Upload to a Georeferenced Project
Georeferenced Projects automatically validate your point cloud's CRS on upload and reproject it into the Project CRS if needed. This ensures all Project files are spatially consistent with each other.
Steps
Open your Georeferenced Project from the Projects or Dashboard page.
Click the Upload button in the top-right corner of your Georeferenced Project page.
Select the Point Cloud option.
Select your file(s) by clicking to upload, or drag and drop them directly into the upload area. You can upload up to ten (10) files at once.
Check your Project CRS information in the dialog box. Your point clouds must match this CRS; otherwise it will be automatically reprojected to the Project CRS.
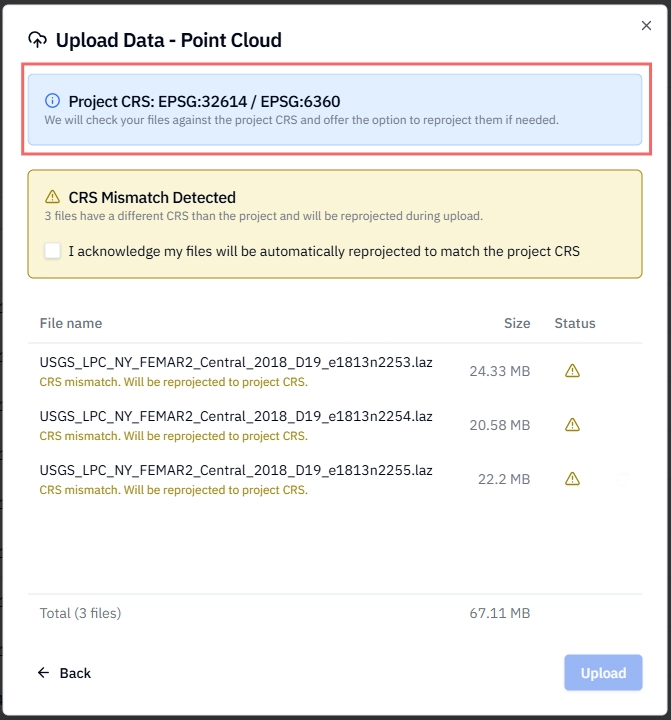
If applicable, acknowledge the CRS reprojection. Otherwise, if there are no errors, click the Upload button.
Stitch3D validates the CRS of your file and begins reprojecting and processing it into the Project CRS.
Once processing is complete, your point cloud will appear in the Project file list.
View the point cloud by either clicking directly on the file or the View Project button (next to the Upload button).
✅ Confirmation: You'll receive an email notification when your point cloud has finished processing and is ready to view.
ℹ️ Note: If your file's CRS cannot be detected automatically, you may be prompted to specify it manually before processing begins. If you're unsure of your file's CRS, check the export settings in the software you used to process your point cloud.
What happens during processing
After you upload a point cloud, Stitch3D runs it through an automated processing pipeline before it's available to view. Here's what's happening behind the scenes:
Validation — your file is checked for format integrity and metadata completeness
CRS detection — for georeferenced projects, the file's coordinate reference system is identified
Reprojection — if the file's CRS differs from the Project CRS, it's reprojected automatically
Tiling and optimization — the point cloud is tiled and optimized for fast, smooth rendering in the browser-based viewer at any zoom level
Processing time depends on file size. Most point clouds are ready within a few minutes. Very large files (several GB) may take longer.
ℹ️ Note: You can close the browser tab while your file processes — you'll receive an email when it's ready for viewing.
Supported point cloud formats
Stitch3D accepts the following point cloud file types:
💡 Tip: Convert .las files to .laz before uploading. LAZ is lossless (no data is lost) and files are typically 80–90% smaller, making uploads significantly faster and saving storage space on your plan.
Related articles
How to add supporting documents