Viewer settings (Personal)
🕐 Read time: 4 min
Written By Clark Yuan
Last updated About 2 months ago
Overview
The personal viewer settings let you customize how Stitch3D looks and behaves in the viewer specifically for you. These settings are personal to your account: when multiple users are collaborating on the same Project, each person can configure their own settings independently without affecting anyone else's view.
Personal viewer settings are different from file-level display settings, which apply globally to the Project for all users.
How to access viewer settings
Open a Project and enter the viewer.
Click the Personal viewer settings icon in the toolbar centered at the top of the viewer. The icon looks like a two-line menu (similar to a hamburger menu, but with two lines instead of three).
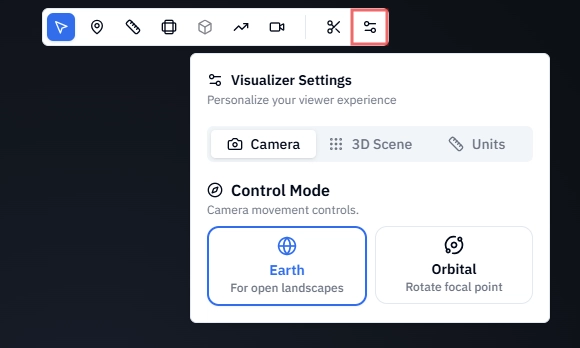
A dialog box opens with three tabs: Camera, 3D Scene, and Units.
Camera tab
The Camera tab controls how you navigate and interact with the point cloud in the viewer. You can choose between two camera control modes:
💡 Tip: Earth mode is the more precise option for measurement work; your cursor acts as an anchor so you can zoom directly into the area you're annotating. Switch to Orbital mode when you want to rotate around and present a model from multiple angles.
3D Scene tab
The 3D Scene tab has two sliders that control how the point cloud is rendered in your viewer.
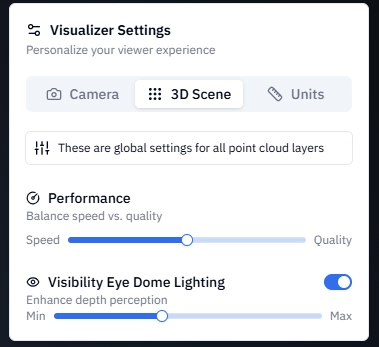
Performance
The Performance slider controls the balance between rendering speed and visual quality by adjusting the point budget — the maximum number of points displayed in the viewer at one time.
💡 Tip: If your viewer feels sluggish or points are loading slowly, drag the slider toward Speed. Once your hardware or connection improves, move it back toward Quality to see the full resolution of your data.
ℹ️ Note: The Performance slider adjusts only how many points are rendered in your viewer at any one time. It does not affect the underlying data. Moving the slider toward Speed does not delete or degrade your point cloud.
Eye Dome Lighting (EDL)
Eye Dome Lighting is a shading model that adds depth and definition to your point cloud by accentuating the outlines of objects. The EDL slider goes from Min to Max.
💡 Tip: Increase EDL when measuring structures or inspecting terrain features. The enhanced depth perception makes it significantly easier to identify edges and boundaries accurately. Min EDL is better when you're working with a colorized point cloud and want to preserve the original colors without shading.
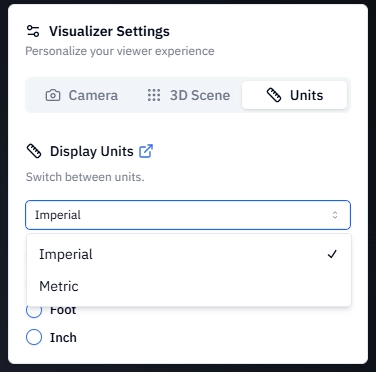
Units tab
The Units tab sets your display units, which is the unit of measurement used to show all measurement results in the viewer. Display units are personal to your account and can be changed at any time without affecting any underlying data.
Display units vs. base units
It's important to understand the difference between these two settings:
Example in practice: If your point cloud has a base unit of Meters but your display unit is set to Centimeters, a measured distance of 2 meters will be shown as 200 cm in the viewer. The underlying data is unchanged; only the display is converted.
How to set your display unit
Select a unit system — Metric or Imperial
Select your preferred unit within that system
Metric options: Centimeter · Meter · Kilometer
Imperial options: Inch · Foot · Yard · Mile
Your selection applies immediately to all active measurements in the viewer.
ℹ️ Note: Changing your display unit applies to all measurements shown in the viewer, does not affect the base unit of any file, does not modify or reproject any point cloud data, and can be changed at any time without data loss.
💡 Tip: If you're working on a Project with an international team, confirm your display unit settings match before comparing or discussing measurements — two users looking at the same volume result will see different numbers if one is set to Feet and the other to Meters.