Using the slicing tool
🕐 Read time: 3 min
Written By Clark Yuan
Last updated About 2 months ago
Overview
The slice tool lets you isolate a specific region of a point cloud by cropping out areas you do not need to see. It is useful for inspecting interior features, isolating a single floor of a building, examining a cross-section of terrain, or focusing a measurement on a specific part of a dense dataset without permanently altering the underlying data.
ℹ️ Note: Slicing is a temporary Viewer preference. It does not modify or save a new version of your point cloud. When you exit the Project, all slice settings are cleared and the point cloud returns to its original full view.
Before you start
The slice tool is only available in the 3D Viewer. It is not available in 2D view.
Slicing only applies to the currently selected point cloud layer. If you have multiple point clouds in your Project, make sure the correct file is selected in the Layers Panel before activating the tool.
How to slice a point cloud
Open a Project and enter the 3D Viewer.
Select the point cloud layer you want to slice in the Layers Panel.
Click the Slice icon in the toolbar at the top center of the Viewer.
A dropdown appears with two options:
Toggle slice box — activates the slice box around the point cloud
Reset — returns the point cloud to its original unsliced view
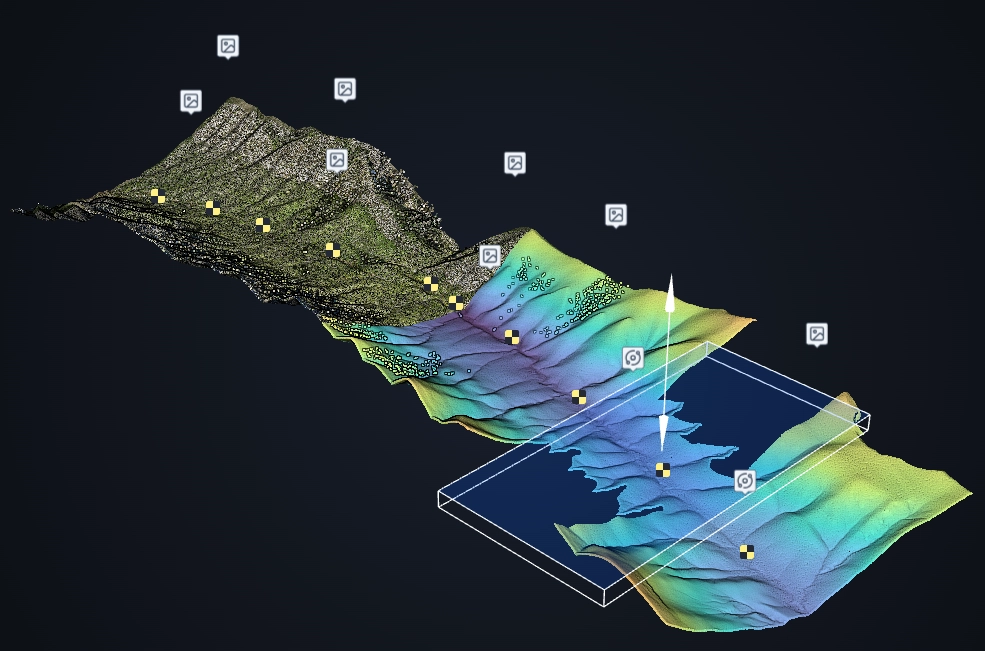
Click Toggle slice box to activate it.
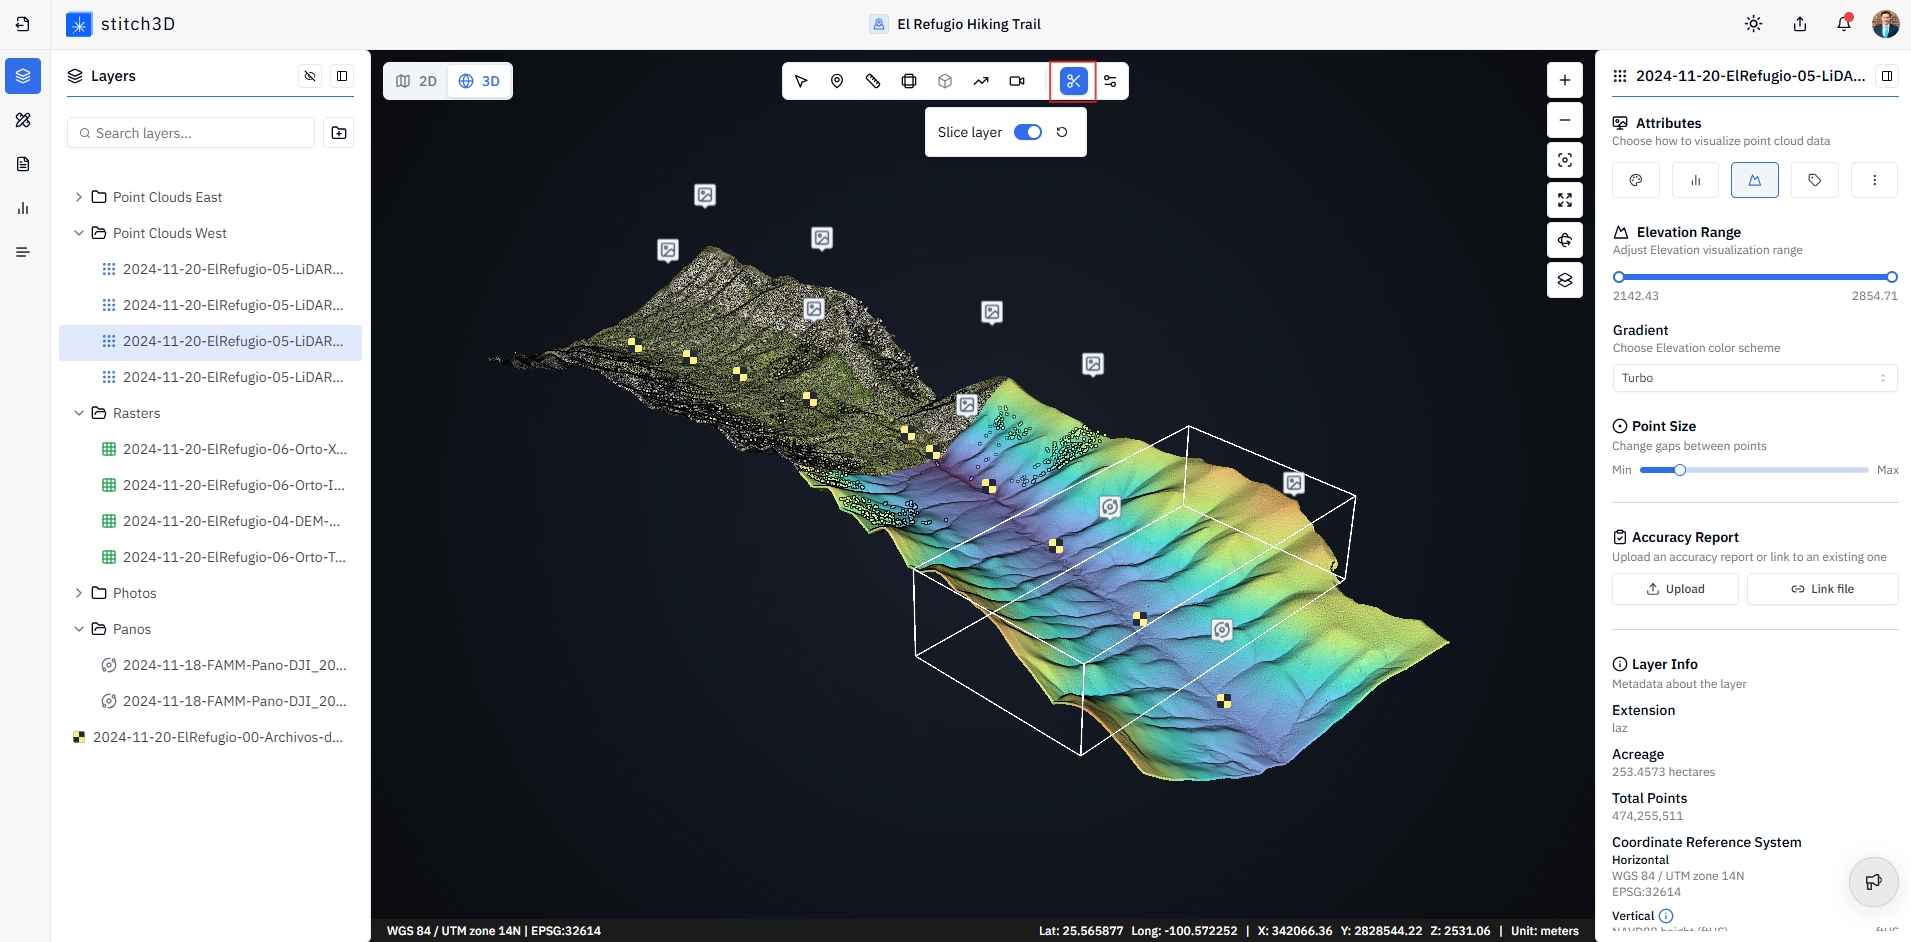
✅ A bounding box appears around the entire point cloud, with six faces, eight edges, and eight corner handles.
Adjusting the slice box
Once the slice box is active, you have two ways to control it.
Moving the faces
Each of the six faces of the box can be pushed in or pulled out independently. Drag any face inward to crop out the data on that side, or outward to reveal more.
Drag the top or bottom face to isolate a specific elevation range such as a single floor of a building or a narrow band of terrain
Drag the left, right, front, or back face to crop out areas horizontally
Rotating along an edge
Grab any of the eight edges of the box and drag to rotate the slice plane around that edge. This gives you precise angular control which becomes useful for aligning the slice to a sloped surface, a wall face, or an irregular boundary.
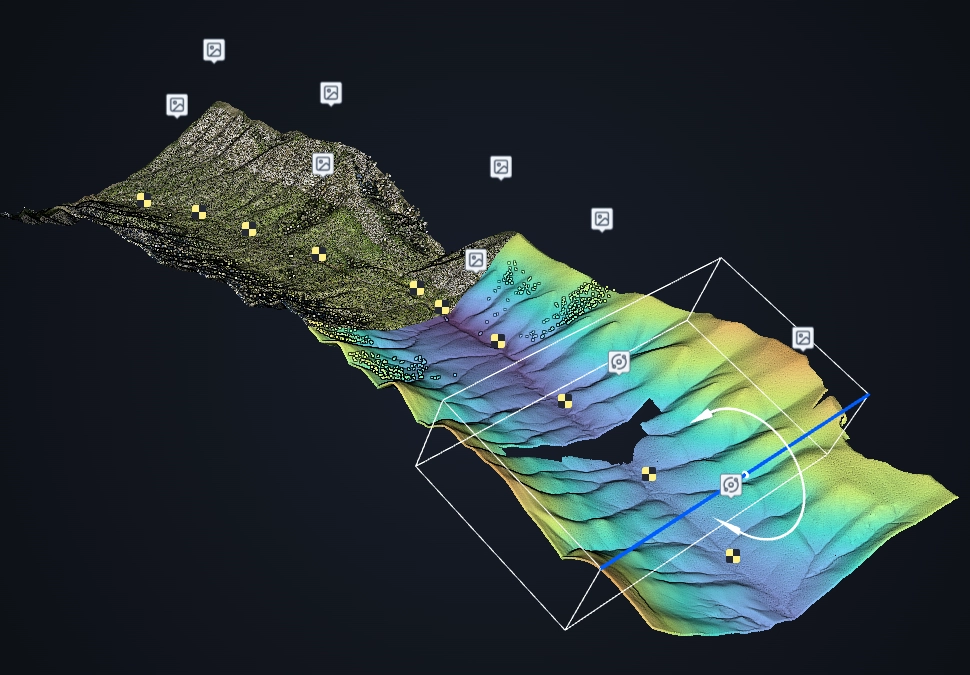
💡 Tip: Combine face adjustments with edge rotations to isolate complex features. For example, to inspect the interior of a sloped roof structure, crop the outer walls using the side faces and tilt the top face along an edge to follow the roof pitch.
Resetting the view
To remove the slice and return to the full point cloud, click the Slice icon again and select Reset. The bounding box is cleared and the full point cloud is restored.