Managing Projects, folders, and files
🕐 Read time: 5 min
Written By Clark Yuan
Last updated About 2 months ago
Overview
Keeping your Projects organized makes it faster to find files, easier to share the right data with the right people, and less painful to hand projects off to teammates or clients. This article covers creating folders, renaming, moving, sorting, searching, and naming conventions in Stitch3D.
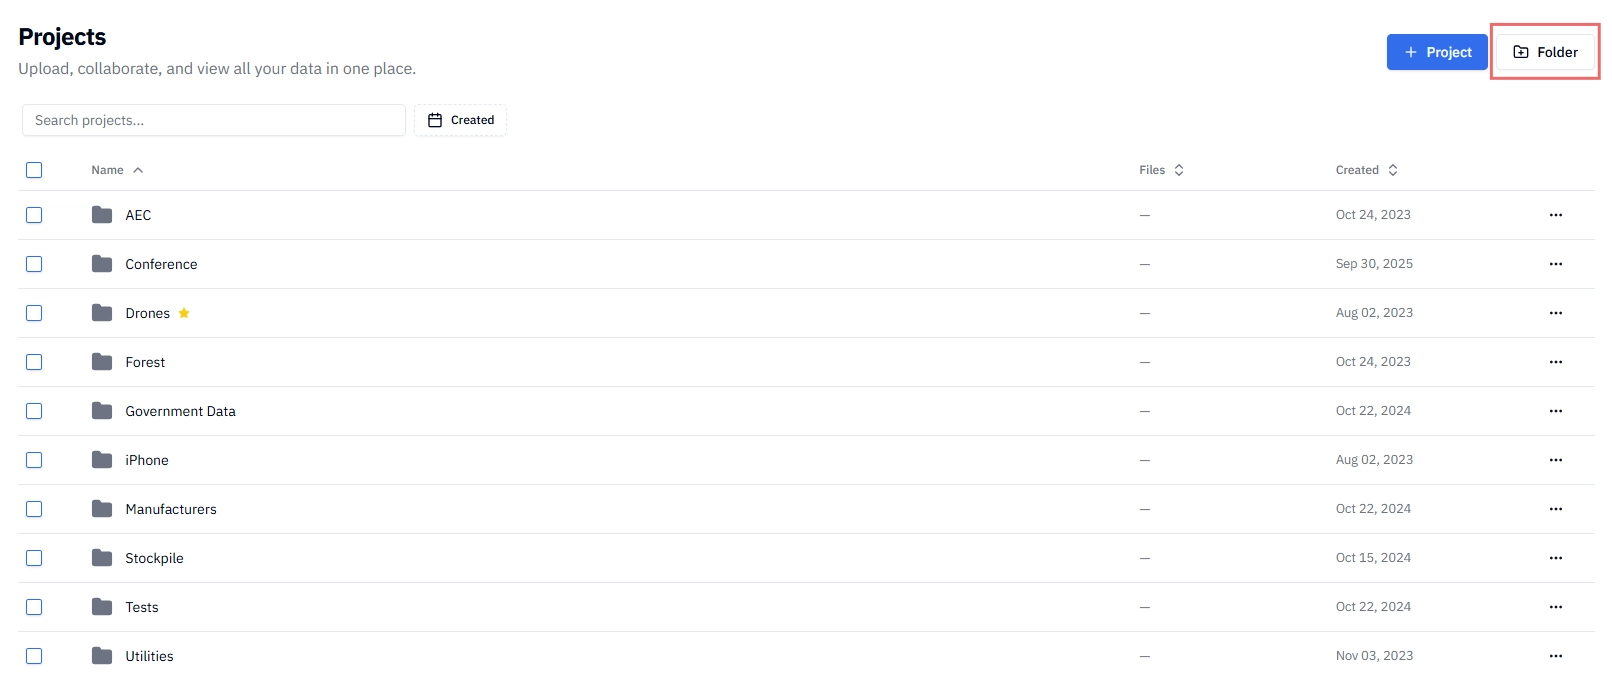
Creating folders
Folders let you group related Projects together.
From the Projects page, click the + Folder button in the top-right corner of the page.
Enter a folder name and click + Add Folder to confirm.
Move related Projects to your new folder.
💡 Tip: Create your folder structure before uploading, not after. It's much faster to upload Projects directly into the right folder than to move Projects around once they're processed.
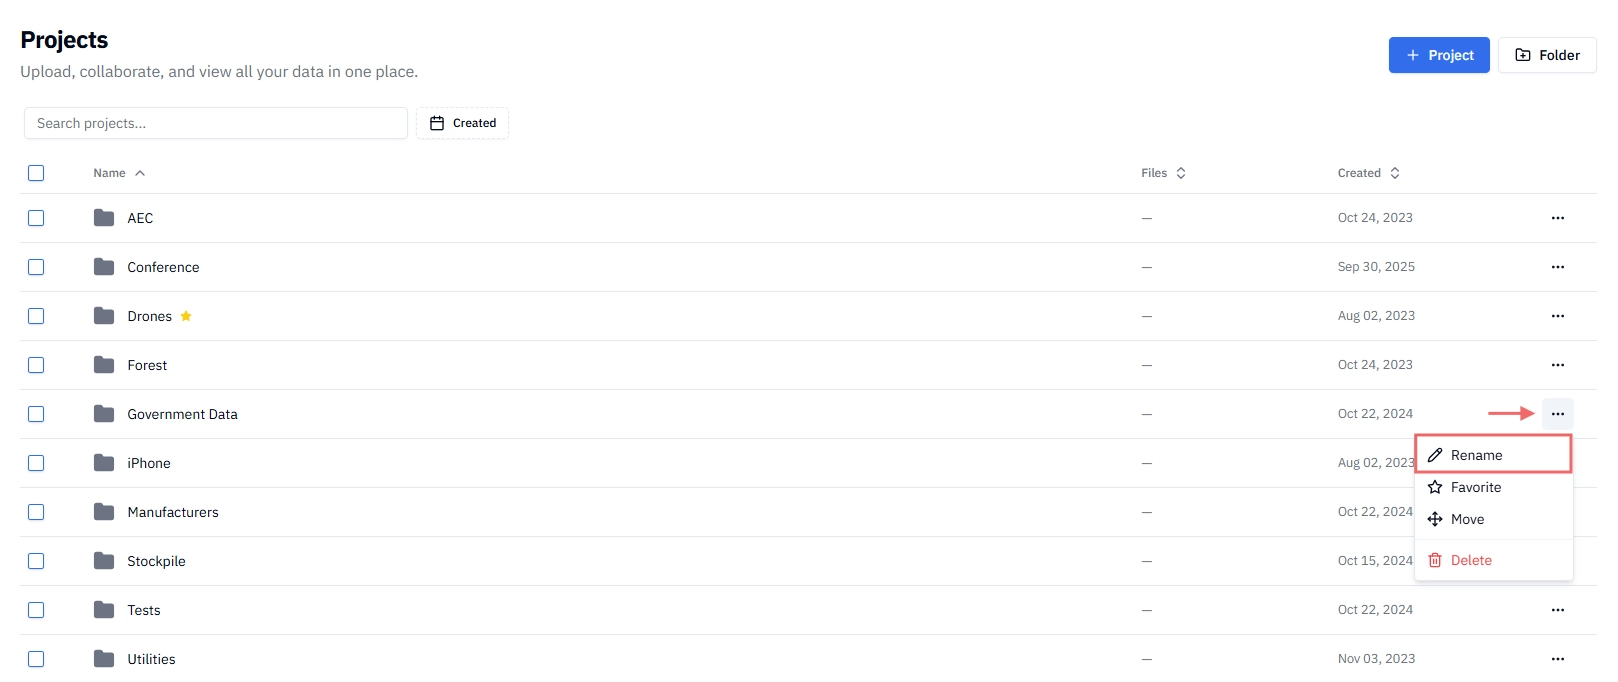
Renaming folders, Projects, and files
You can rename any folder, Project, or file at any time.
Click the ⋯ (more options) menu that appears to the right of each folder, Project, and file.
Select Rename.
Type the new name and press Rename to save.
ℹ️ Note: Renaming a file does not affect the original file on your computer or change anything about how it displays in the viewer — only the name shown in Stitch3D is updated.
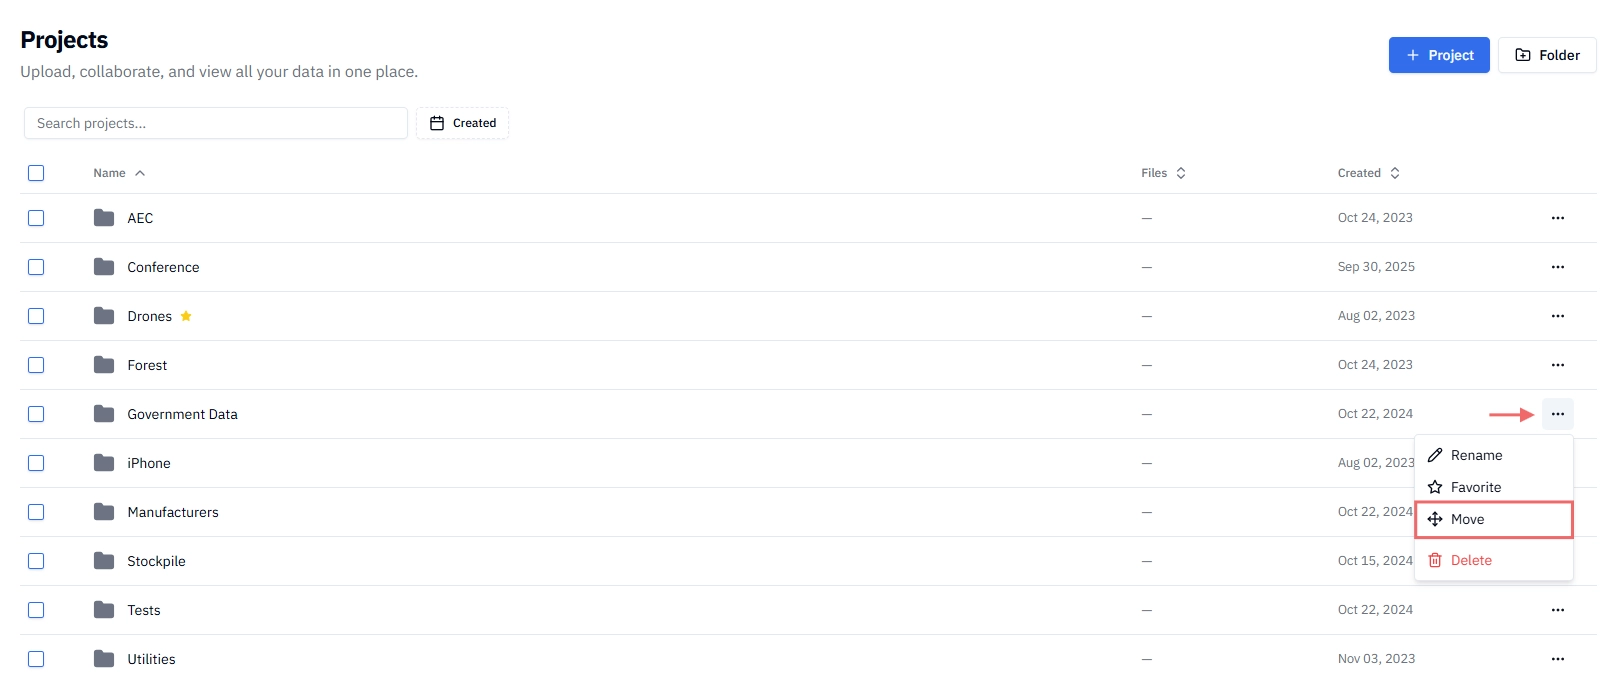
Moving Projects or folders into another folder
Click the ⋯ (more options) menu.
Select Move.
Select the destination folder from the list and press Move to confirm.
💡 Tip: You can select multiple Projects and move them all at once. See Selecting multiple Projects below.
Selecting multiple Projects and folders
To move or delete several Projects and/or folders at once:
Click the checkbox that appears next to each Project and folder to select it.
Continue clicking checkboxes to add more files to your selection.
Use the action bar that appears at the bottom of the page to move or delete the selected Projects and/or folders.
Sorting files
You can change how Projects, folders, and files are sorted to find what you need faster.
Click the Sort option at the top of the Projects, Shared, and Favorites pages.
Choose your preferred sort order:
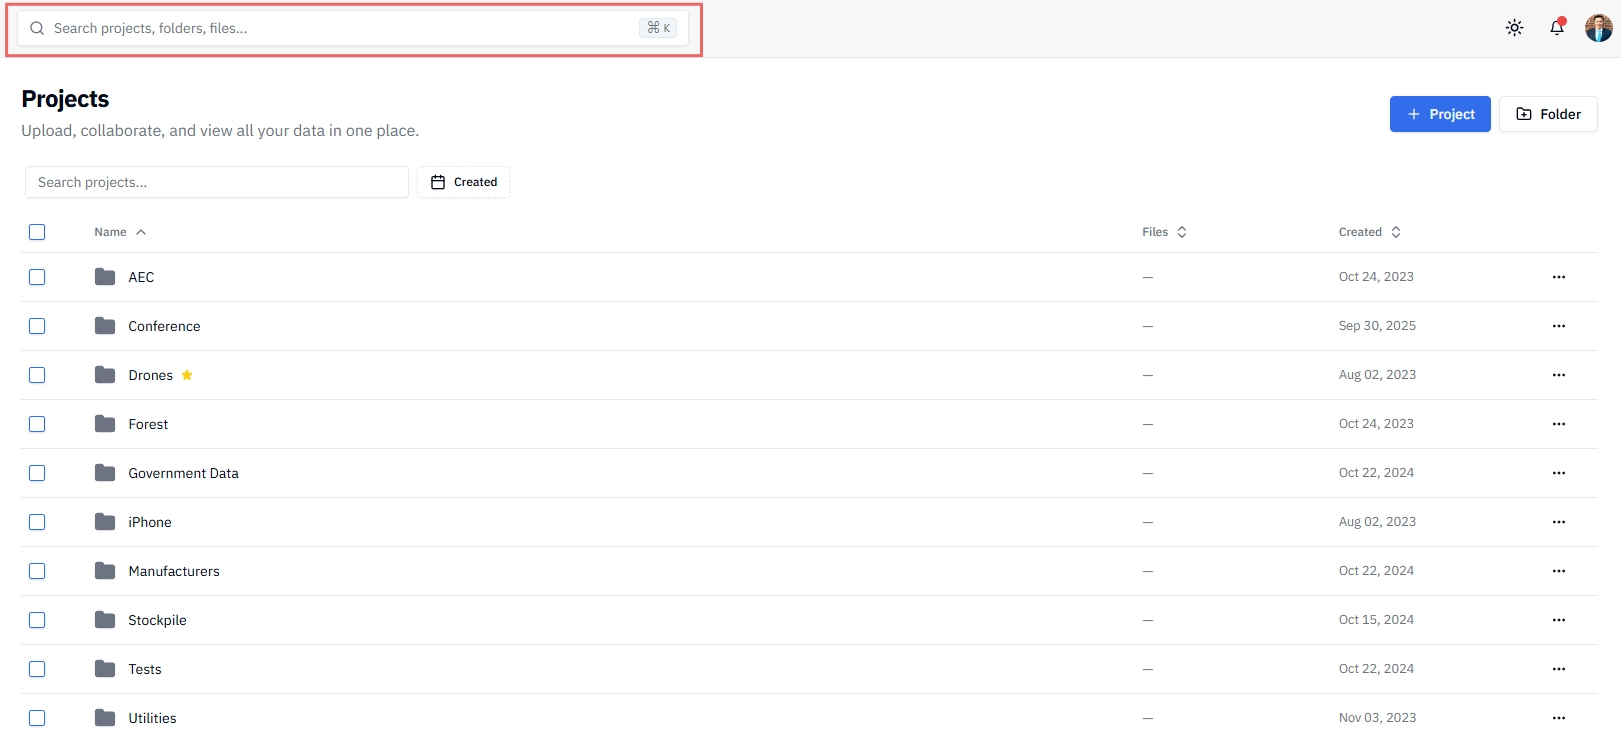
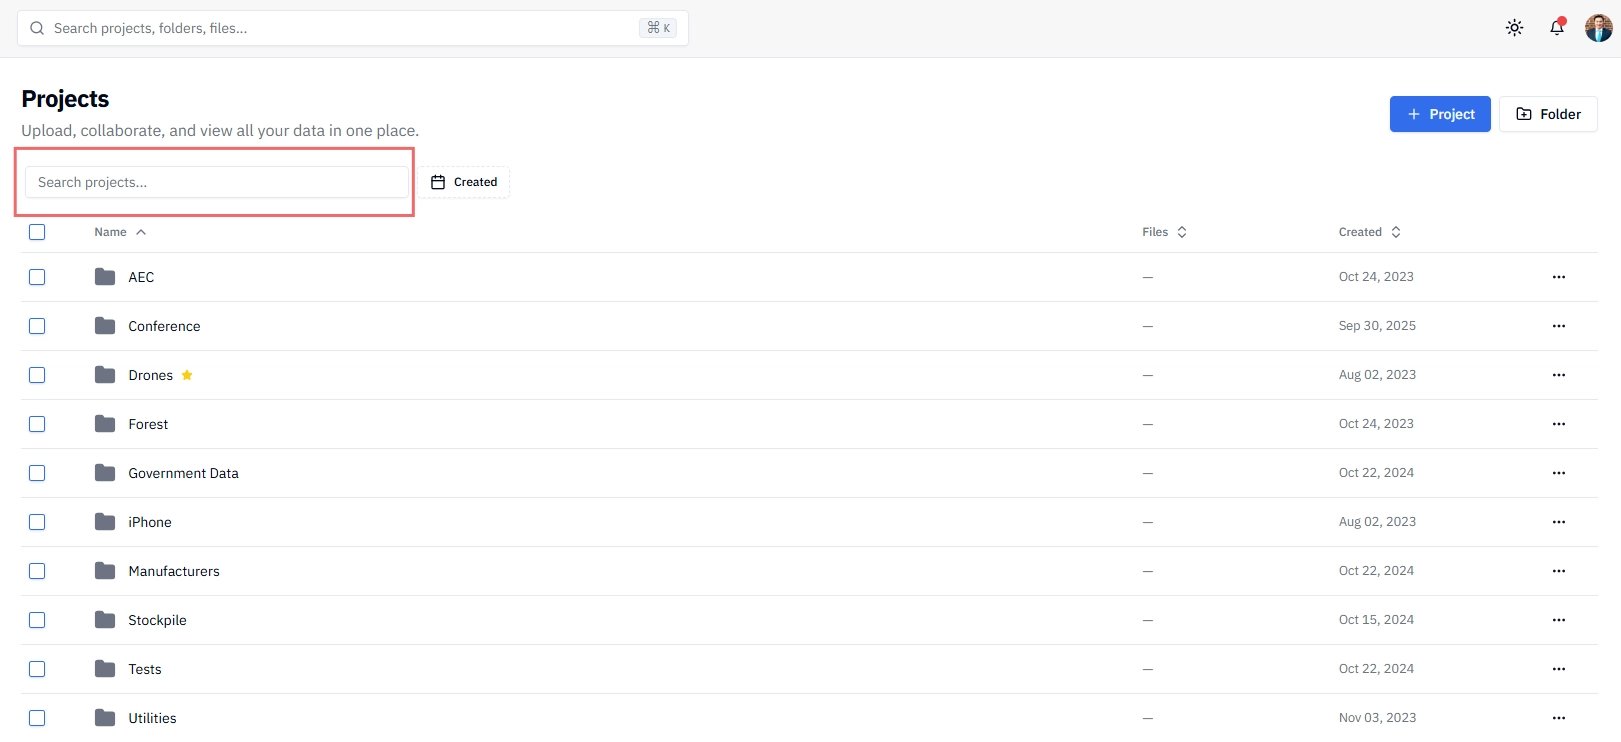
Searching for Projects and files
The global search bar at the top of your workspace lets you find Projects, folders, and files quickly without scrolling or browsing. Stitch3D uses fuzzy search — your search terms don't need to be exact or perfectly spelled for results to appear.
Click the Search bar at the top of your workspace.
Start typing a Project name, folder name, or file name.
Results appear as you type.
Click any result to open it directly.
You can also search for Projects, folders, and files locally within the Projects, Shared, and Favorites pages.
How fuzzy search works:
Fuzzy search matches results even when your input is partial or slightly off. For example:
💡 Tip: Because search is fuzzy, consistent naming conventions make results even more reliable. A file named north-pit_lidar_2024-03 will surface whether you search north pit, lidar, or 2024 — three different ways a teammate might look for the same file.
ℹ️ Note: Search covers Project names, folder names, and file names across your workspace. It does not search inside specific file contents or annotation text.
Deleting folders, Projects, and files
Click the ⋯ (more options) menu.
Select Delete.
Confirm the deletion in the dialog that appears by clicking Delete.

⚠️ Deleting a file is permanent. Stitch3D does not have a trash or restore function. Once a folder, Project, or file is deleted, it cannot be recovered. Double-check before confirming.
⚠️ Deleting a folder deletes all Projects and files inside it. Make sure you don't need any of the Projects in a folder before deleting it.
Naming conventions
Consistent Project and folder names save time, especially when sharing with clients or teammates who didn't set up the Project.
Recommended naming patterns:
Avoid:
Special characters in filenames:
# % & * { } \\ / : < > ? |Vague names like
final,new, orv2without context —acme-co_orthomosaic-v2-client-approvedis better thanfinal_FINALOverly long names — keep folder names under 50 characters where possible
💡 Tip: Agree on a naming convention with your team before starting a new Project and stick to it. The best naming system is one everyone actually uses.
Recommended Project structure
There's no single right way to organize a Project but this structure works well for most spatial data workflows:
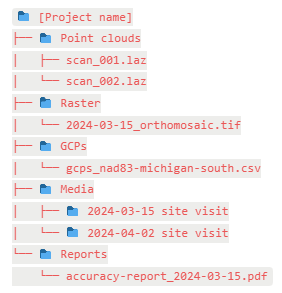
💡 Tip: If you're delivering a Project to a client, keep deliverable files in a dedicated
Deliverables or Client folder and set appropriate sharing permissions on that folder only — so clients only see what they need.